Saturday, June 15, 2013

More In-Color Pages


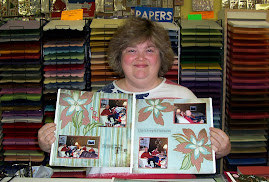
I made these pages Thursday when I crafted with my friend, Deb.  They are CASEd from some birthday pages I found on the internet by Lisa Curcio.  Her pages were made in bright, cheerful colors and had a birthday image in the circle on the left.   I thought the design worked well with our new in-colors and a floral theme, too.


On the left-hand side, I used four-inch strips of Coastal Cabana, Crisp Cantaloupe, and Strawberry Slush cut from 8 1/2 x 11 cardstock.  They're attached to a 12 x 12 sheet of Baked Brown Sugar.  The circle is cut from Very Vanilla cardstock, and I used my favorite SAB set, Bloomin' Marvelous, for the design.  It's such a versatile set.  I'm so glad to have it in my stash.


The right-hand side has two different types of banners.  I placed pearls at the V on the long strips on the right.  I left the punched banners blank for now in case I can use them for my title.  If I can't, I'll add pearls to them, too.  The circles may end up as spots for pictures, journaling, or a title.

When I first started scrapping, I only made pages to go with my pictures.  Then I took some classes where we made pages first and added the pictures later.  How eye opening!  I could make pages much faster that way and get a lot more scrapping done.  Now I almost always make my pages first.

When I go to retreats, I take all my pre-made pages and pictures and match them up!  I also take extra cardstock and embellishments in case I need to add anything.  It's amazing how many more pages I can get done that way.  At the last retreat, I completes over 20 pages and still had time to play scrapbook bingo, eat lots of good food, and have fun!

Friday, June 14, 2013

In-Color Birthday Pages


I'm really happy with my new pages!  They're based on a layout I CASEd from the internet.  Don't the new colors go well together?


This side is my favorite!  After I added  my pictures, I decided to punch 3/4 in. circles out of the Strawberry Slush cardstock and add them to the top of each cupcake as cherries.  They look so cute.  I wish I'd thought to do that before I'd taken the picture.


I love the candles on this side.  I used my bird punch to make them.  Who would ever guess the flames were actually wings if I didn't tell them?

I had a blast crafting with my friend yesterday and completed three, double-page spreads.  I look forward to sharing them with you.

Wednesday, June 12, 2013

Finally scrapbooking again!


Finally started scrapbooking again.  These pages are CASEd from the internet, but I've viewed so many I don't remember who to give the credit to.  I needed lots of pages for birthday pictures.


The left-hand side has two birds made from the SU! bird punch, and they are wearing party hats I  made from scraps.  The original page I cased had two owls.


I used Pool Party and Calypso Coral to mount the pictures.  The DSP comes from the Everyday Enchantment pack that is retired from a previous SAB but still available on the Clearance Rack.  The page backgrounds are Lucky Limeade that just retired as well.  The scallops are made with the Bigz XL die that has different types of trim.  I used Crumb Cake for them.

I was pleased with how the pages turned out and can't wait to add a title, pictures, and journaling.  Tomorrow I'm meeting my friend, Deb, to craft and hope I have LOTS more pages to show you in the future now that school's out for summer.

Sunday, April 7, 2013

Epic This and That DSP

When my This and That bundle arrived, I fell in love with the designer series paper that came with it and decided to use it for a few cards.  I'm still struggling with photographing cards for my blog and hope these are better than the last ones!


This card uses crumb cake as a base with daffodil delight as mats and ink.  I used the Upsy Daisy stamp from March's Best of Flowers set. 


This card uses basic gray as a base with DSP as the mat.  I used the retired corner punch with whisper white paper to bring out the white pattern in the DSP.  I used night of navy for the bicycle in the SAB Feeling Sentimental stamp set and basic black for the celebrate sentiment at the bottom.  The pool party shape was cut, using my Sizzix Labels Collection Framelits.  Small white brads finished out the look.


The second card has a daffodil delight base, The Epic This and That DSP as a  mat, and black ink for both the bicycle and sentiment on the pool party cardstock.  The Sizzix Labels Collection Framelits make it so easy to cut shapes quickly and will even let me cut more than one at a time. This card has small silver brads as accents to change things up a little.  I'm always struggling to come up with masculine cards for birthdays and think both of these celebrate cards will work well for that.

 
The last card is my favorite one.  It has a pool party base, a DSP mat, more pool party that was embossed with the lace embossing folder from the spring catalogue, and flowers and leaves from the SAB Bloomin' Marvelous stamp set in daffodil delight and gumball green on very vanilla cardstock.  The centers of the flowers are pool party cardstock to tie everything together.
 
I have several more cards using this awesome designer series paper and can't wait to finish them and share them here in the future.
 
Now is a great time to pick up the This and That bundle from Stampin' Up! for 15% off AND get free shipping through Monday, April 8th.
 
If you don't have a Stampin' Up! demo, I'd be happy for you to order from my site:
 

Sunday, March 24, 2013

It feels great to be back!

It's taken me four years, but I'm finally back and on track! 

I love being a Stampin' Up! demo again.  This time around I've been making a lot of cards with all the goodies I earned during SAB.  With my limited vision, card making has been the perfect way to ease myself back into crafting, and my mother-in-law and sister-in-law love receiving them as gifts.

Even though they've been around a long time, I'd never done a One Sheet Wonder before, so I started with an easy version.  All you have to do is take an 8 1/2 x 11 sheet of printed paper and cut it into four rectangles that are 4 1/4 x 5 1/2 each.  The trick comes from what you do with each rectangle.  The first one is cut diagonally and makes two cards.


The second rectangle is cut in half either horizontally or vertically.  (I'm still learning how to take pictures with my new camera, and it doesn't seem to be as blog friendly as my old one.  I do love the great SAB buttons, though!)


The third rectangle is cut into two sections:  one that is 1/3 of the paper and another that is 2/3s of it.


Love that matching SAB ribbon!  The background paper was embossed with the lace embossing folder.


My mother-in-law needed cards that could be used in a variety of situations, so I used the Celebrate You stamp from one of the old birthday sets.  She can use it for birthdays, graduations, congratulations, etc.

The final rectangle is cut into 3 sections.  To change things up, I used the reverse side of the Sycamore Street DSP paper for one of the cards.  My sister-in-law liked this one best!


I had a little trouble with the last one and would definitely cut or tear the paper differently next time!


I hope you enjoy seeing my first attempt at One Sheet Wonder card making.  I look forward to sharing a different version with you next time!
 

Sunday, October 4, 2009

Happy Birthday, Judy!


Judy and I have been friends since 1st grade! This card uses the new Spiced Curry and Rich Razzleberry in-colors and the Razzleberry Lemonade DSP. I really like how it turned out and love the new butterfly and modern label punches!

Wednesday, September 23, 2009

A Big Thanks!

A big thanks to everyone for their kind words and encouragement! After I completed three surgeries in three months for my eye--and was unable to salvage the vision in it, my husband ended up in the hospital for 19 days and had two surgeries of his own.

He was diagnosed with Grave's Disease and Myasthenia Gravis. He has been home from the hospital for several weeks and is finally able to go back to work part time. He's still being fed from a tube in his stomach, but he is also able to swallow some things, and the list of foods he can swallow is growing.

I couldn't have made it without his family's willingess to take over with his 24/7 care and give me some rest.

Now I'm back at work full time and enjoying being in my new classroom with my students. We're getting geared up to start making the items for our craft fairs, and I can't wait to post some of them here on my blog.

Sunday, September 20, 2009

Flower Fantasia!


This was the option I gave those who wanted more "girly" pages! I'll probably use them to scrap the multitude of pictures my husband took of our Crepe Myrtles since they are different shades of pink. With all the extra rain this summer, their blooms really took off!

Once again I used Basic Black for the background paper. The photo mats are Whisper White and Rose Red. The large flowers are Regal Rose.

I just love how the Basic Black background makes everything pop! And the flower punches add just enough embellishment without being overwhelming. I can't wait to finally put my pictures on these pages!


Out of This World!


These are pages I made at a workshop in May! I finally got my digital camera charged up so I could share the pictures!


The hostess knew some of her friends weren't big stampers (imagine that!), so I focused on the quality of our cardstock and our fun punches.


I'm planning to use these pages for a field trip my 7th graders took to the Planetarium, but I offered them as an option for those with little boys. I used Basic Black for my background paper, Summer Sun and Pumpkin Pie for my photo mats, and Pacific Point for the planets.

These pages would look really sharp with our new in-colors: Crushed Curry, Dusty Durango, and Bermuda Bay!

Saturday, July 4, 2009

More Razzleberry Lemonade


This card uses two of my favorite prints from the Razzleberry Lemonade DSP. I just love purples and pinks together, and I think the addition of Crushed Curry really made the flowered pattern pop! I used Crushed Curry cardstock for my base, the strip of eyelet, and the sentiment. I really had fun with my punches on this card, too. I used the ticket corner punch on the DSP, the eyelet border punch, and our new modern label punch for the sentiment. Isn't it a cool shape? The ink for the sentiment is Melon Mambo. I'm already in love with that color!

Wednesday, July 1, 2009

Just a Little Thanks!


Thanks to those who sent such kind responses after my last post! My third surgery was yesterday, and at the follow-up appointment today, the surgeon told me things went "as expected." The main purpose of this surgery was to remove the cataract that had developed after the second surgery and prepare my eye for the final surgery later this month.


I'm so excited about the new catalog launching today! Don't you just love the new in-colors? Since purple is my favorite color, I was very happy for the Rich Razzleberry cardstock that I used as the base for this card. I also stamped the sentiment in Rich Razzleberry on Whisper White cardstock and matted it on the new, Crushed Curry cardstock.


The DSP on the card comes from the Razzleberry Lemonade pack and also showcases the new in-colors Melon Mambo and Dusty Durango. I love the variety of patterns in this DSP pack, so you'll definitely be seeing more of it!

Tuesday, June 23, 2009

New Catalog

Can't wait for the new catalog to go online next Wednesday!

I've made several cards using the new products and can't wait to share them with you. Most of them are thank you cards since that's what I've needed.

For those of you who don't know, I've been off-line since the end of March due to health issues. I had surgery in April and again in May to try to preserve the vision in my left eye. I have another surgery scheduled next Tuesday and one more in July. After that, we will have done all we can do.

I was worried about how the loss in vision would affect my crafting, but so far, I've been able to focus on small projects. I haven't tackled a double-page spread, yet, but the new in-colors and DSPs are already inspiring me to try.

I look forward to sharing my creations with you!

Wednesday, March 25, 2009

Last Christmas Layout--for Awhile!

This is another Christmas layout I made at the retreat. It's also based on a sketch I used for one of my birthday layouts.
The layout uses some of the DSP from the holiday mini catalog, and I borrowed my friend's Cricut to cut the title again.

I haven't journaled, yet, because I have a lot I want to say and need to type my feelings to fit them all in the box on this page. I like the way this layout uses the Ticket Corner punch to give it a different look. I need to use that punch more often!


Tuesday, March 24, 2009

Christmas Album Cover Page


This is the cover page for my Christmas album. It's yet another variation of the page I made with the Raspberry Tart DSP for my goddaughter's photo and with the Candy Lane paper for my birthday pictures. I'm just in love with this page map! I used papers from the Holiday Mini for this page and layered some Felt Flurries for my embellishment. I'm also beginning to wonder how I ever survived without my lace border punch. I hope we get more border punches like this when the new catalog comes out this summer. Like all my pages, this one is 12 x 12, but this page map could easily be scaled down to fit a smaller page--especially since the Felt Flurries came in a variety of shapes and sizes.

Sunday, March 22, 2009

Holiday Treasures Layout #2

This is the second layout I made with the Holiday Treasures DSP. I left room for a title and subtitle as well as a little journaling.
I love the way the poinsettia DSP goes with the plaid, and I just had to use some of the Chocolate Chip 1/4 in. grosgrain ribbon instead of matting the poinsettia paper for a little extra shine.

I also added round tabs in the plaid paper and centered each tab with a circle fire brad for more "blingability." Now I just need to find the perfect Christmas pictures for the pages!


Saturday, March 21, 2009

Holiday Treasures Layout #1

Everyone loved the patterned poinsettia paper that came in the Holiday Treasures DSP. It was so much fun to make pages with that I tried to make it go as far as possible. The photo mats on this layout were perfect for the out takes I found when sorting my pictures.

The left-hand page was originally designed for the poinsettia DSP to go on the left side with room at the top for a title. But since I had two vertical shots, I flipped the page, numbered my photos, and plan to journal in the blank spot to the right.

I used a friend's Cricut to cut my title and numbers out of Pink Pirouette card stock. I really like the way it looks with the flowers and lightens the feel of the layout.


Christmas in March?

I can't believe my spring break is almost "sprung"! It started off at a scrapbooking retreat in Dixon, Texas. This was our first time to go there, and we had a blast! There was a lot more cropping space than our previous location, plus each bedroom had its own private bath. Wow!
Believe it or not, but this was the first time the people who ordered my 20 page Christmas kit had a chance to get together and make their pages! This is another double-page spread I created from the I Wish Simply Scrappin' Kit. These kits are definitely the best bargain around.
The left-hand side uses the I wish . . . title from the kit.
The right-hand side uses the stickers from the kit that tells what I wish for!


Tuesday, March 10, 2009

Pink Flamingo Layout #1

My best friend and her husband just got back from a cruise to the Bahamas, so I ordered the Pink Flamingo DSP to use in her scrapbook. All I can say is "Wow!" Some of the patterns look like they were cut from the back of Tom Selleck's shirts when he starred on Magnum P.I. !

The flower embellishments are the new Sizzix Embosslits dies. I love how they both emboss and cut out the image for you. So-o-o-o-o simple to use! The three dies that are shown here are SU! exclusive. I layered the SU! Real Red Cherry Blossom die-cuts on top of the Summer Sun Simple Flower ones and alternated them with Tempting Turquoise Flower Burst images. The borders still didn't look "finished" to me, so I punched holes with my retired 1/4 in. circle punch and added them for a little extra pop!

I'm not sure how I ever scrapped without the Stampin' Up Sizzix Top Note die! I added parts of it to each border in Tempting Turquoise so I can add a title when I get Judy's pictures, and she can do a little journaling. I hope she likes the completed pages!

Saturday, March 7, 2009

Celebrate You Candy Lane Layout

I liked the layout I made for my goddaughter so much that I decided to use the sketch again to make more birthday pages with the Candy Lane DSP. I replaced the flower embellishment with the circular Celebrate You stamp from the Party Hearty set and put a pink rhinestone brad in its center. I also added three small pink rhinestone brads under the photo mats.

Since this isn't going to be framed to stand alone, I made this page to go on the right-hand side with more leftover DSP scraps. I also tore the papers at the bottom of the journaling block to mimic the torn paper on the opposite side, and I punched two small circles to continue the circular theme.

This is how the pages look when they're put together. The colors are more striking in real life. The flash bleached out the DSP on the left-hand side. I can't wait to get use these pages at the scrapbooking retreat I'm going to next weekend.