Wednesday, March 25, 2009

Last Christmas Layout--for Awhile!

This is another Christmas layout I made at the retreat. It's also based on a sketch I used for one of my birthday layouts.
The layout uses some of the DSP from the holiday mini catalog, and I borrowed my friend's Cricut to cut the title again.

I haven't journaled, yet, because I have a lot I want to say and need to type my feelings to fit them all in the box on this page. I like the way this layout uses the Ticket Corner punch to give it a different look. I need to use that punch more often!


Tuesday, March 24, 2009

Christmas Album Cover Page


This is the cover page for my Christmas album. It's yet another variation of the page I made with the Raspberry Tart DSP for my goddaughter's photo and with the Candy Lane paper for my birthday pictures. I'm just in love with this page map! I used papers from the Holiday Mini for this page and layered some Felt Flurries for my embellishment. I'm also beginning to wonder how I ever survived without my lace border punch. I hope we get more border punches like this when the new catalog comes out this summer. Like all my pages, this one is 12 x 12, but this page map could easily be scaled down to fit a smaller page--especially since the Felt Flurries came in a variety of shapes and sizes.

Sunday, March 22, 2009

Holiday Treasures Layout #2

This is the second layout I made with the Holiday Treasures DSP. I left room for a title and subtitle as well as a little journaling.
I love the way the poinsettia DSP goes with the plaid, and I just had to use some of the Chocolate Chip 1/4 in. grosgrain ribbon instead of matting the poinsettia paper for a little extra shine.

I also added round tabs in the plaid paper and centered each tab with a circle fire brad for more "blingability." Now I just need to find the perfect Christmas pictures for the pages!


Saturday, March 21, 2009

Holiday Treasures Layout #1

Everyone loved the patterned poinsettia paper that came in the Holiday Treasures DSP. It was so much fun to make pages with that I tried to make it go as far as possible. The photo mats on this layout were perfect for the out takes I found when sorting my pictures.

The left-hand page was originally designed for the poinsettia DSP to go on the left side with room at the top for a title. But since I had two vertical shots, I flipped the page, numbered my photos, and plan to journal in the blank spot to the right.

I used a friend's Cricut to cut my title and numbers out of Pink Pirouette card stock. I really like the way it looks with the flowers and lightens the feel of the layout.


Christmas in March?

I can't believe my spring break is almost "sprung"! It started off at a scrapbooking retreat in Dixon, Texas. This was our first time to go there, and we had a blast! There was a lot more cropping space than our previous location, plus each bedroom had its own private bath. Wow!
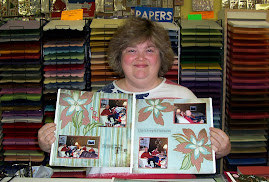
Believe it or not, but this was the first time the people who ordered my 20 page Christmas kit had a chance to get together and make their pages! This is another double-page spread I created from the I Wish Simply Scrappin' Kit. These kits are definitely the best bargain around.
The left-hand side uses the I wish . . . title from the kit.
The right-hand side uses the stickers from the kit that tells what I wish for!


Tuesday, March 10, 2009

Pink Flamingo Layout #1

My best friend and her husband just got back from a cruise to the Bahamas, so I ordered the Pink Flamingo DSP to use in her scrapbook. All I can say is "Wow!" Some of the patterns look like they were cut from the back of Tom Selleck's shirts when he starred on Magnum P.I. !

The flower embellishments are the new Sizzix Embosslits dies. I love how they both emboss and cut out the image for you. So-o-o-o-o simple to use! The three dies that are shown here are SU! exclusive. I layered the SU! Real Red Cherry Blossom die-cuts on top of the Summer Sun Simple Flower ones and alternated them with Tempting Turquoise Flower Burst images. The borders still didn't look "finished" to me, so I punched holes with my retired 1/4 in. circle punch and added them for a little extra pop!

I'm not sure how I ever scrapped without the Stampin' Up Sizzix Top Note die! I added parts of it to each border in Tempting Turquoise so I can add a title when I get Judy's pictures, and she can do a little journaling. I hope she likes the completed pages!

Saturday, March 7, 2009

Celebrate You Candy Lane Layout

I liked the layout I made for my goddaughter so much that I decided to use the sketch again to make more birthday pages with the Candy Lane DSP. I replaced the flower embellishment with the circular Celebrate You stamp from the Party Hearty set and put a pink rhinestone brad in its center. I also added three small pink rhinestone brads under the photo mats.

Since this isn't going to be framed to stand alone, I made this page to go on the right-hand side with more leftover DSP scraps. I also tore the papers at the bottom of the journaling block to mimic the torn paper on the opposite side, and I punched two small circles to continue the circular theme.

This is how the pages look when they're put together. The colors are more striking in real life. The flash bleached out the DSP on the left-hand side. I can't wait to get use these pages at the scrapbooking retreat I'm going to next weekend.


Monday, March 2, 2009

Embellished Raspberry Tart Layout with Photo


Right after I finished making this page, my goddaughter, Kayla, sent me this black and white photo for my birthday. It was perfect for this layout. I added her name with a Sizzix alphabet, made two more flowers with the fire red circle brads, and added stitching with my white gel pen. When it was done, I framed it in a glossy black frame. She'll be so excited when she sees it, and I'll get to enjoy looking at it every day!

Sunday, March 1, 2009

Raspberry Tart Single Layout


Last weekend I took an online class with this page map. I used the patterns of Raspberry Tart DSP I hadn't tried, yet. This shabby chic type page isn't my normal style, but I liked the way it worked. Tomorrow I'll post the finished page with my god daughter's picture.