Judy and I have been friends since 1st grade! This card uses the new Spiced Curry and Rich Razzleberry in-colors and the Razzleberry Lemonade DSP. I really like how it turned out and love the new butterfly and modern label punches!
 A big thanks to everyone for their kind words and encouragement! After I completed three surgeries in three months for my eye--and was unable to salvage the vision in it, my husband ended up in the hospital for 19 days and had two surgeries of his own.


I'm planning to use these pages for a field trip my 7th graders took to the Planetarium, but I offered them as an option for those with little boys. I used Basic Black for my background paper, Summer Sun and Pumpkin Pie for my photo mats, and Pacific Point for the planets.
These pages would look really sharp with our new in-colors: Crushed Curry, Dusty Durango, and Bermuda Bay!


 This is another Christmas layout I made at the retreat. It's also based on a sketch I used for one of my birthday layouts.
 The layout uses some of the DSP from the holiday mini catalog, and I borrowed my friend's Cricut to cut the title again.
 I haven't journaled, yet, because I have a lot I want to say and need to type my feelings to fit them all in the box on this page. I like the way this layout uses the Ticket Corner punch to give it a different look. I need to use that punch more often!
 This is the second layout I made with the Holiday Treasures DSP. I left room for a title and subtitle as well as a little journaling.
 I love the way the poinsettia DSP goes with the plaid, and I just had to use some of the Chocolate Chip 1/4 in. grosgrain ribbon instead of matting the poinsettia paper for a little extra shine.
 I also added round tabs in the plaid paper and centered each tab with a circle fire brad for more "blingability." Now I just need to find the perfect Christmas pictures for the pages!
 Everyone loved the patterned poinsettia paper that came in the Holiday Treasures DSP. It was so much fun to make pages with that I tried to make it go as far as possible. The photo mats on this layout were perfect for the out takes I found when sorting my pictures.
 The left-hand page was originally designed for the poinsettia DSP to go on the left side with room at the top for a title. But since I had two vertical shots, I flipped the page, numbered my photos, and plan to journal in the blank spot to the right.
 I used a friend's Cricut to cut my title and numbers out of Pink Pirouette card stock. I really like the way it looks with the flowers and lightens the feel of the layout.
 The left-hand side uses the I wish . . . title from the kit.
 The right-hand side uses the stickers from the kit that tells what I wish for!
 My best friend and her husband just got back from a cruise to the Bahamas, so I ordered the Pink Flamingo DSP to use in her scrapbook. All I can say is "Wow!" Some of the patterns look like they were cut from the back of Tom Selleck's shirts when he starred on Magnum P.I. !
 The flower embellishments are the new Sizzix Embosslits dies. I love how they both emboss and cut out the image for you. So-o-o-o-o simple to use! The three dies that are shown here are SU! exclusive. I layered the SU! Real Red Cherry Blossom die-cuts on top of the Summer Sun Simple Flower ones and alternated them with Tempting Turquoise Flower Burst images. The borders still didn't look "finished" to me, so I punched holes with my retired 1/4 in. circle punch and added them for a little extra pop!
 I'm not sure how I ever scrapped without the Stampin' Up Sizzix Top Note die! I added parts of it to each border in Tempting Turquoise so I can add a title when I get Judy's pictures, and she can do a little journaling. I hope she likes the completed pages!
 I liked the layout I made for my goddaughter so much that I decided to use the sketch again to make more birthday pages with the Candy Lane DSP. I replaced the flower embellishment with the circular Celebrate You stamp from the Party Hearty set and put a pink rhinestone brad in its center. I also added three small pink rhinestone brads under the photo mats.
 Since this isn't going to be framed to stand alone, I made this page to go on the right-hand side with more leftover DSP scraps. I also tore the papers at the bottom of the journaling block to mimic the torn paper on the opposite side, and I punched two small circles to continue the circular theme.
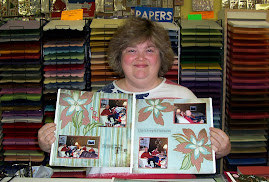
 This is how the pages look when they're put together. The colors are more striking in real life. The flash bleached out the DSP on the left-hand side. I can't wait to get use these pages at the scrapbooking retreat I'm going to next weekend.

 You may have noticed recently that I've made quite a few birthday pages. As soon as my pictures are ready, I'll be using them and making even more!
 Putting this layout together was so much fun! I challenged myself to use the DSP and Rose Red cardstock scraps from my previous layouts, and this is what I came up with.
 Textured Kiwi Kiss cardstock became my base, and although you can't tell it in these photos, the strips made from the new Lace Border punch are actually DSP in Rose Red with a light pattern on it.
 I love the way the scraps made me leave my comfort zone and try something different! Even my photo mats are odd sizes for me, and I've tried not to crop and fix all my photos before I print them so I can experiment. To finish it off (before I add pictures, a title, and journaling), I used my Round Tab punch to make embellishments from the other side of the DSP. After this experience, I definitely think scraps rock!
 I'm still in love with the Raspberry Tart DSP and the SU! exclusive Sizzix Sweetest Stem Embosslit die. The die was made to match the Raspberry Tart paper and really embellishes it well.
 While this page may look like it has strips of the DSP on it, I actually used strips of the Real Red textured cardstock to divide the DSP because I happened to have them left over from another project. This particular DSP has white in it so I decided to use Whisper White as my photo mats. I also used Stampin' Dimensionals to pop the die-cut flowers.
 I left room on the right-hand side to put my title, and I may do my journaling with the awesome SU! white gel pen. I think it would look really good written on the red cardstock strips on both pages. Tomorrow I'll post the pages I made from the scraps of the first two layouts!
 The DSP I used for embellishment also gave me a chance to use my new SU! exclusive Sizzix embosslit, Sweetest Stem. If you've never used an embosslit, they are amazing! They cut and emboss at the same time! How easy is that?
 And to add a finishing touch, I used my build-a-brads and punched one of the little flowers out of the DSP to accent inbetween the embossed stems. Voila! What an easy accent to make to tie everything together.
 I saw a magazine layout that used 2 x 2 squares and thought I'd try it, but the pattern didn't work for my pictures, so I came up with this instead.


 The mat on this page holds two 4 x 6 photos. I included two more punched pears on Stampin' Dimensionals for embellishments and half of the SU! exclusive Sizzix Top Note die for my title box. My new SU! exclusive Sizzix Billboard alphabet strip has really been getting a work out since it came in. I used it to make my title letters.
 This layout is based on a Becky Fleck page map in the January/February issue of Memory Makers magazine. It's definitely more labor intensive than my previous layouts, but I love how it show cases so many SU! products.
 This side uses the new lace border punch, Sizzix Scallop #2, the Boho Blossoms punch, the SU! exclusive Little Leaves Sizzix die, and the SU! exclusive Billboard Alphabet Sizzix strip die. I also used the retired SU! 1/4 in. circle punch and wish I'd ordered extras since it makes the perfect faux brads around the right-hand side of the scallop.
 This side also uses the Little Leaves Sizzix die to create the vine image, the Boho Blossoms punch, the 1/4 in. circle punch for the flower centers, the lace border punch, the Billboard Alphabet strip die, and the beautiful SAB So Saffron ribbon. I really love how the blue-patterned SAB Designer Series Paper makes the flower centers pop. Now I can't wait for spring to get here so our yellow roses will start blooming and I can add their pictures to these pages!